Skip to content
Step 1: Pre-Planning
- Make sure to measure the length of the area you want to place the lights on
- We recommend having the lights go up your wall, but if you prefer to start the line of lights from the top of your wall, you will need LED strip clips to help hold up the power supply against the wall.

Step 2: Preparing the Surface
- Use a dry rag or a dry paper towel to clean the area you'll be applying the lights onto. This will ensure the area is clean so the adhesive can hold on strongly.

Step 3: Revealing the Adhesive
- Peel back the plastic on the back of the LED strip to reveal the adhesive.
- Only peel about 2 feet ahead to make sure the rest of the LED strip doesn't catch debris

Step 4: Installation
- Start applying the beginning of the strip against the wall.
- We recommend staying as close to the corner where the wall and ceiling meet to make sure the lights stay in a straight line when applying them.
- Having someone else hold the other end of the lights and peel the plastic from the adhesive will help make this process easier

Step 5: Make them Stick
- Once fully installed, go back and press flat along the LED strip to make sure the adhesive strongly stays onto the wall
Step 6: Powering your Lights
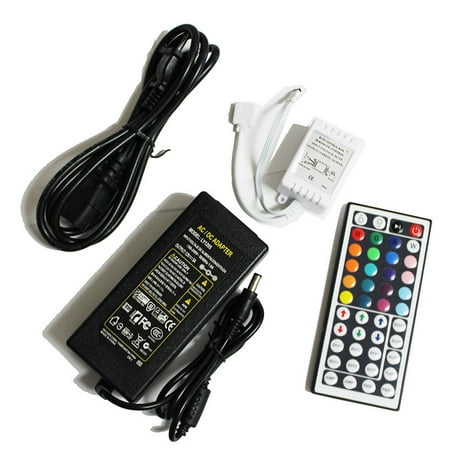
- Connect the Controller Receiver (white box) to the LED strip
- The LED Strip and Controller Receiver (white box) both have arrows at the connection point. Make sure those arrows are facing each other so the lights receive the correct signals.
- If needed. use a screw or LED strip clips to help hold up the power supply. The adhesive can be slightly pulled down if the power supply end is too heavy


Step 7: Powering your Lights (2)
- Connect a power supply to the Controller Receiver (white box) and plug it into the closest socket
- If you need a power supply, there are a couple options which you can use.

Step 8: Check your Controller
- Make sure you've purchased a battery at your closest retailer. The Remote uses a CR2025 battery.
- Once you've installed the battery, check the remote by pointing it at the Remote Receiver.
- If nothing happened, please check that the battery was not inserted upside down. Try flipping it over and check if it works
- You can check if the controller is working also by using your phone's camera. If you open your camera app, point the controller at your camera. A working controller will have a light when you watch it through your camera


Sunday,Monday,Tuesday,Wednesday,Thursday,Friday,Saturday
January,February,March,April,May,June,July,August,September,October,November,December
Not enough items available. Only [max] left.
Add to WishlistBrowse WishlistRemove Wishlist


